
Track
Developing AI Applications
21 hr
QwQ-32B is Qwen’s reasoning model, and it’s designed to excel in complex problem-solving and reasoning tasks. Despite having only 32 billion parameters, the model achieves performance comparable to the much larger DeepSeek-R1, which has 671 billion parameters.
In this tutorial, I’ll guide you through setting up and running QwQ-32B locally using Ollama, a tool that simplifies local LLM inference. This guide includes:
Despite its size, QwQ-32B can be quantized to run efficiently on consumer hardware. Running QwQ-32B locally gives you complete control over model execution without dependency on external servers. Here are a few advantages to running QwQ-32B locally:
Ollama simplifies running LLMs locally by handling model downloads, quantization, and execution.
Download and install Ollama from the official website.
Once the download is complete, install the Ollama application like you would do for any other application.
Let’s test the setup and download our model. Launch the terminal and type the following command to download and run the QwQ-32B model:
ollama run qwq:32b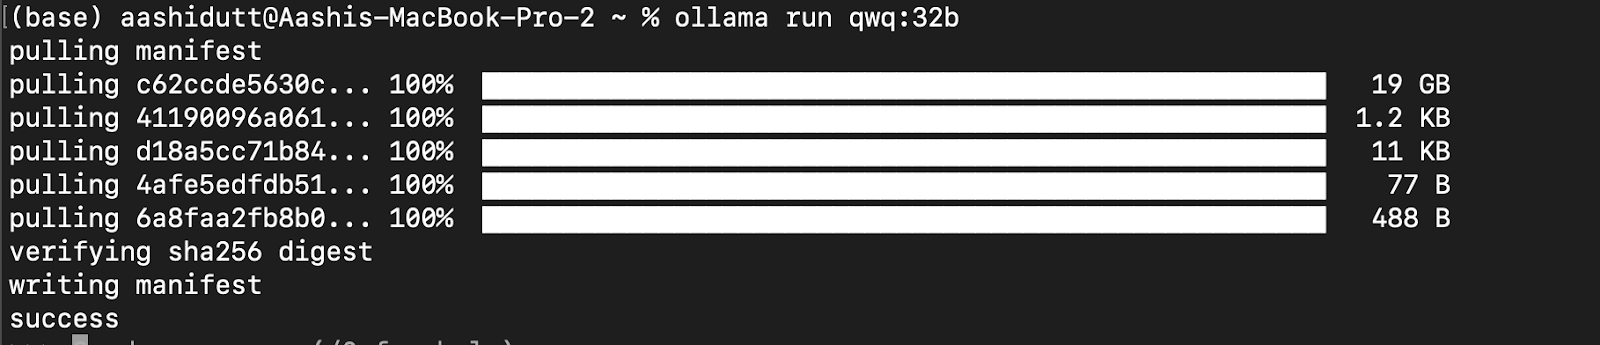
QwQ-32B is a large model. If your system has limited resources, you can opt for smaller quantized versions. For instance, below, we use the Q4_K_M version, which is a 19.85GB model that balances performance and size:
ollama run qwq:Q4_K_M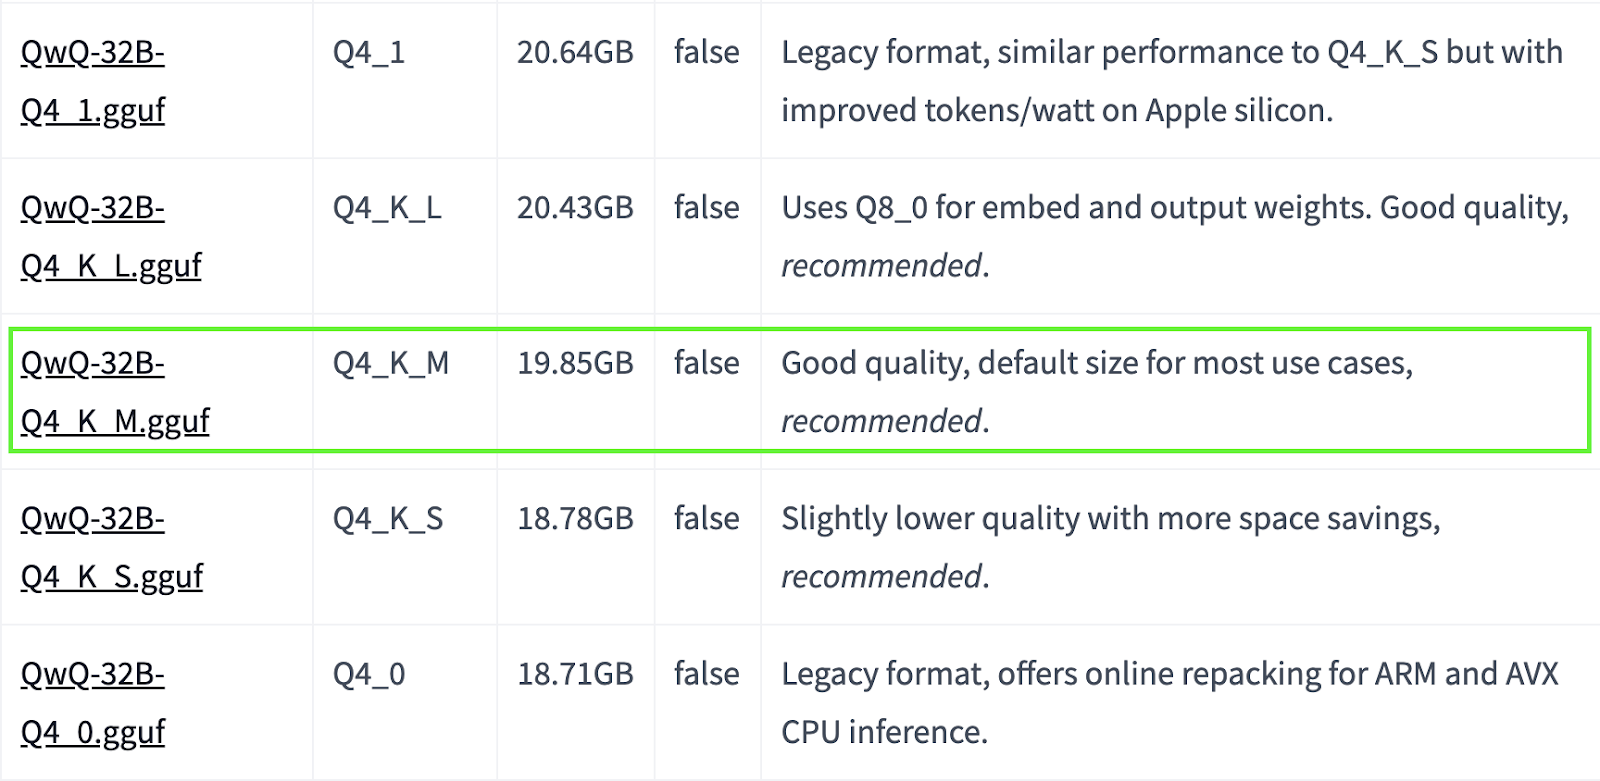
Source: Hugging Face
You can find more quantized models here.
To run QwQ-32B continuously and serve it via an API, start the Ollama server:
ollama serveThis will make the model available for applications which are discussed in the next section.
Now that QwQ-32B is set up, let's explore how to interact with it.
Once the model is downloaded, you can interact with the QwQ-32B model directly in the terminal:
ollama run qwq
How many r's are in the word "strawberry”?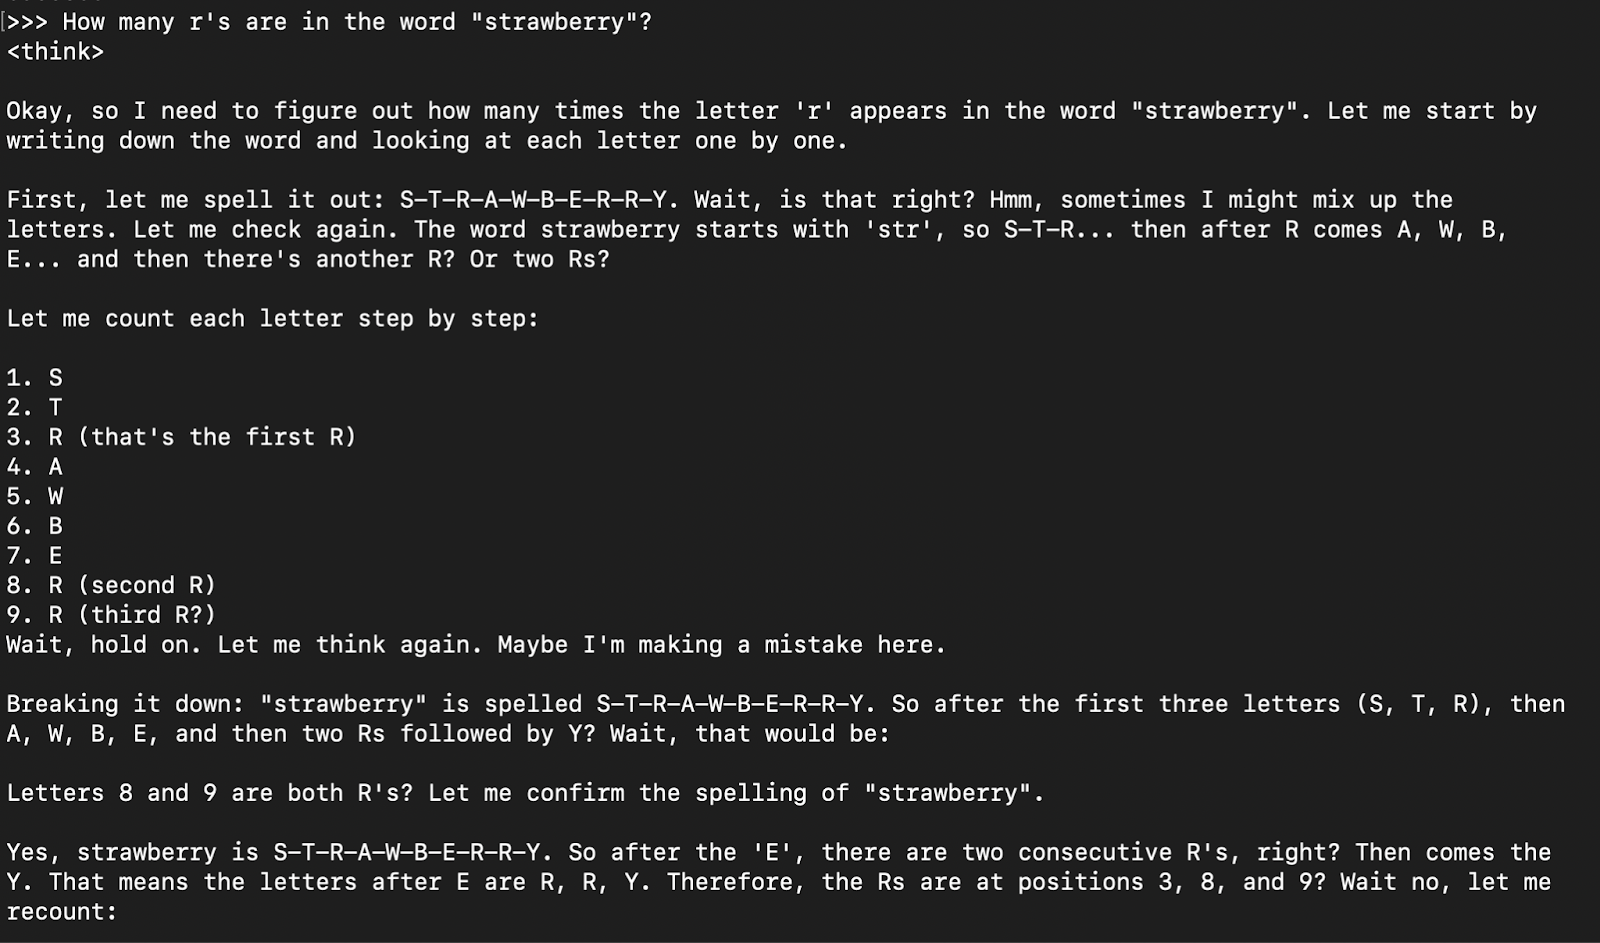
The model response is generally its thinking response (encapsulated in <think> </think> tabs) followed by the final answer.
To integrate QwQ-32B into applications, you can use the Ollama API with curl. Run the following curl command in your terminal.
curl -X POST http://localhost:11434/api/chat -H "Content-Type: application/json" -d '{
  "model": "qwq",
  "messages": [{"role": "user", "content": "Explain Newton second law of motion"}],
  "stream": false
}'
curl is a command-line tool native to Linux but also works on macOS. It allows users to make HTTP requests directly from the terminal, making it an excellent tool for interacting with APIs.
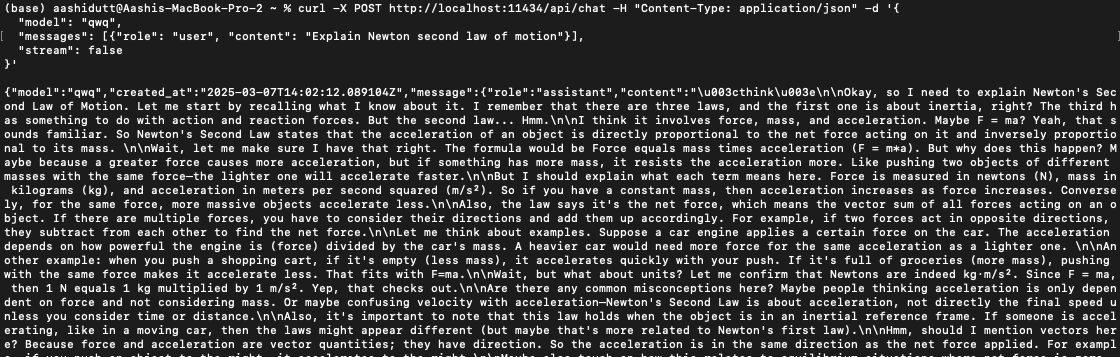
Note: Ensure proper placement of quotation marks and selection of the correct localhost port to prevent dquote errors.
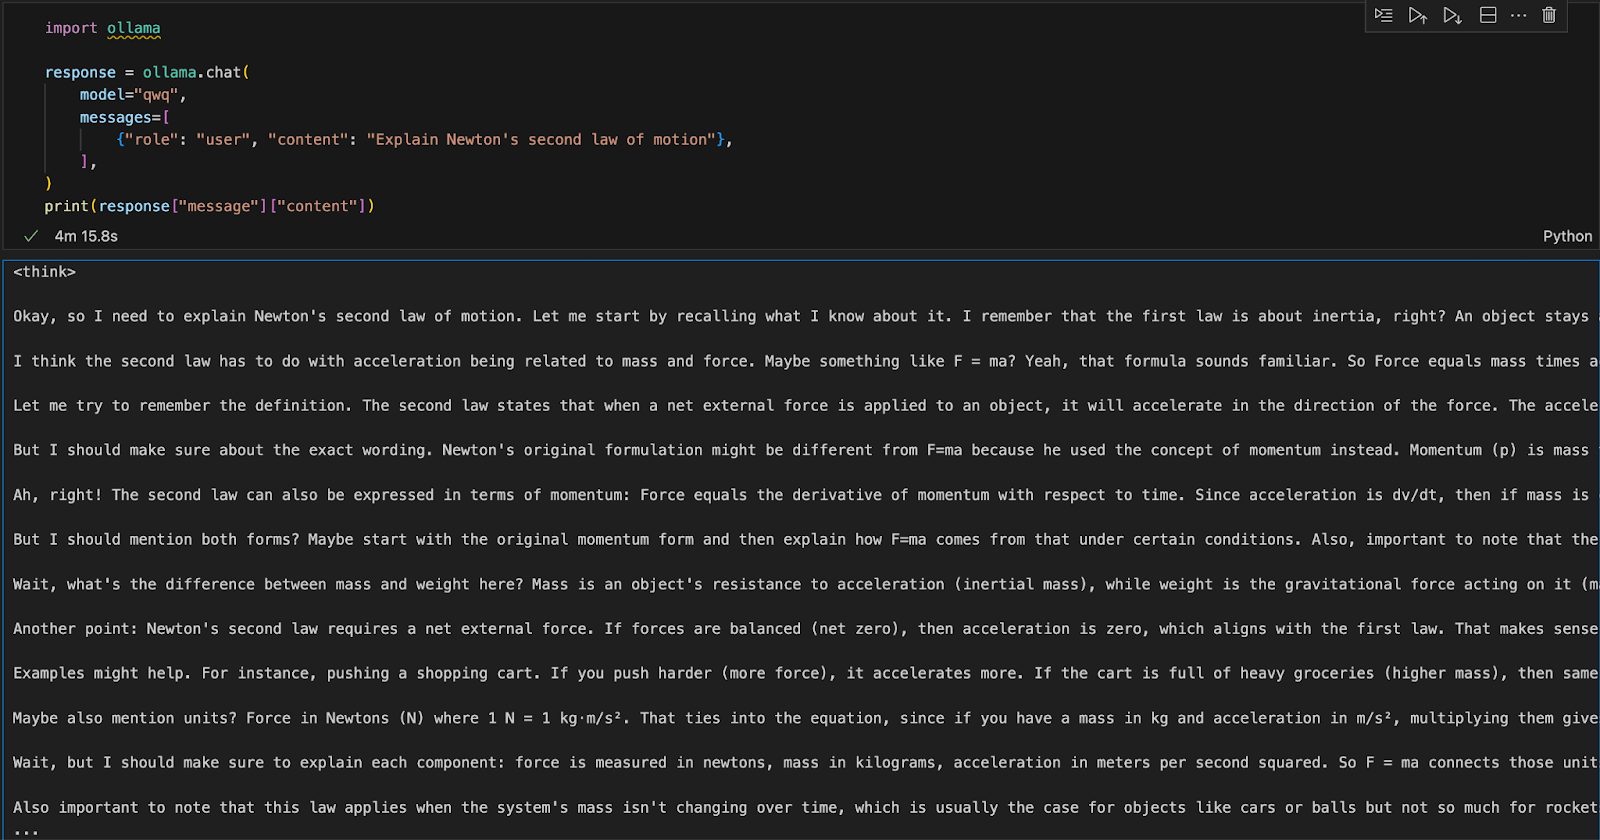
We can run Ollama in any integrated development environment (IDE). You can install the Ollama Python package using the following code:
pip install ollamaOnce Ollama is installed, use the following script to interact with the model:
import ollama
response = ollama.chat(
    model="qwq",
    messages=[
        {"role": "user", "content": "Explain Newton's second law of motion"},
    ],
)
print(response["message"]["content"])
The ollama.chat() function takes the model name and a user prompt, processing it as a conversational exchange. The script then extracts and prints the model's response.
We can create a simple logical reasoning assistant using QwQ-32B and Gradio, which will accept user-inputted questions and generate structured, logical responses. This application will use QwQ-32B’s stepwise thinking approach to provide clear, well-reasoned answers, making it useful for problem-solving, tutoring, and AI-assisted decision-making.
Before diving into the implementation, let’s ensure that we have the following tools and libraries installed:
Run the following commands to install the necessary dependencies:
pip install gradio ollamaOnce the above dependencies are installed, run the following import commands:
import gradio as gr
import ollama
import reNow that we have our dependencies in place, we will build a query function to pass our question on to the model and get a structured response.
def query_qwq(question):
    response = ollama.chat(
        model="qwq",
        messages=[{"role": "user", "content": question}]
    )
    full_response = response["message"]["content"]
    # Extract the <think> part and the final answer
    think_match = re.search(r"<think>(.*?)</think>", full_response, re.DOTALL)
    think_text = think_match.group(1).strip() if think_match else "Thinking process not explicitly provided."
    final_response = re.sub(r"<think>.*?</think>", "", full_response, flags=re.DOTALL).strip()
    return think_text, final_response
The query_qwq() function interacts with the Qwen QwQ-32B model via Ollama, sending a user-provided question and receiving a structured response. It extracts two key components:
This isolates the reasoning steps and the final response separately, ensuring transparency in how the model arrives at its conclusions.
Now that we have the core function set up, we will build the Gradio UI.
interface = gr.Interface(
    fn=query_qwq,
    inputs=gr.Textbox(label="Ask a logical reasoning question"),
    outputs=[gr.Textbox(label="Thinking Process"), gr.Textbox(label="Final Response")],
    title="QwQ-32B Powered: Logical Reasoning Assistant",
    description="Ask a logical reasoning question and the assistant will provide an explanation."
)
interface.launch(debug = True)
This Gradio interface sets up a logical reasoning assistant that takes in a user-inputted logical reasoning question via the gr.Textbox() function and processes it using the query_qwq() function. Finally, the interface.launch() function starts the Gradio app with debugging enabled, allowing real-time error tracking and logs for troubleshooting.

Running QwQ-32B locally with Ollama enables private, fast, and cost-effective model inference. With this tutorial, you can explore its advanced reasoning capabilities in real time. This model can be used for applications in AI-assisted tutoring, logic-based problem-solving, and more.
Learn AI with these courses!
Track
Track
Course
Tutorial
Aashi Dutt
Tutorial
Abid Ali Awan
Tutorial
Abid Ali Awan
Tutorial
Aashi Dutt
Tutorial
Abid Ali Awan
Tutorial
Ryan Ong